It has never been simpler to create Android apps with Jetpack Compose. We’ll guide you through the process of using this cutting-edge UI framework to create a basic calculator app in this post. No matter what amount of experience you have with development, this tutorial will help you get started with Jetpack Compose.
Why Jetpack Compose?
For creating native Android UI, Jetpack Compose is a contemporary toolkit. With fewer code, stronger tools, and user-friendly Kotlin APIs, it streamlines and expedites Android UI development. Here are some reasons to think about utilising Jetpack Compose:
- Declarative user interface: You specify how your user interface (UI) should look rather than writing imperative code.
- Fewer Boilerplate: Compose makes your codebase cleaner by reducing the quantity of boilerplate code.
- Based on Kotlin: Compose offers you a contemporary and expressive language because it is constructed using Kotlin.
Getting Started
Make sure you have the following settings before we start working with the code:
- Download and install the most recent version of Android Studio.
2. Make sure your project is set up to utilise Kotlin.
3. Add the dependencies for Jetpack Compose to your project.
Step 1: Set Up Your Project
First, create a new Android project in Android Studio. Choose an Empty Compose Activity template. This will set up the basic structure and dependencies needed for Jetpack Compose.

Step 2: Add Dependencies
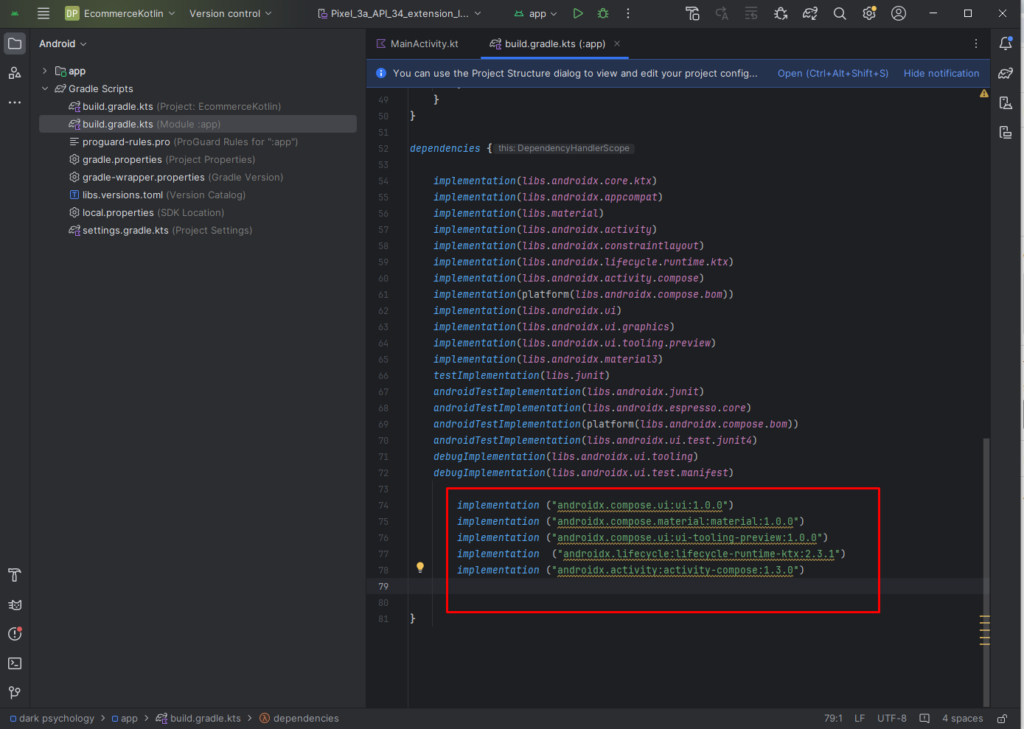
Open your build.gradle file and add the necessary dependencies for Jetpack Compose:
build.gradle.kts
implementation ("androidx.compose.ui:ui:1.0.0")
implementation ("androidx.compose.material:material:1.0.0")
implementation ("androidx.compose.ui:ui-tooling-preview:1.0.0")
implementation  ("androidx.lifecycle:lifecycle-runtime-ktx:2.3.1")
implementation ("androidx.activity:activity-compose:1.3.0")
Step 3: Create the UI
Now, let’s create the user interface for our calculator. Open MainActivity.kt and replace the existing content with the following code:
import android.os.Bundle
import androidx.activity.ComponentActivity
import androidx.activity.compose.setContent
import androidx.compose.foundation.layout.*
import androidx.compose.foundation.text.BasicTextField
import androidx.compose.material.*
import androidx.compose.runtime.*
import androidx.compose.ui.Alignment
import androidx.compose.ui.Modifier
import androidx.compose.ui.unit.dp
import androidx.compose.ui.unit.sp
import androidx.compose.ui.text.input.TextFieldValue

class MainActivity : ComponentActivity() {
    override fun onCreate(savedInstanceState: Bundle?) {
        super.onCreate(savedInstanceState)
        setContent {
            CalculatorApp()
        }
    }
}

@Composable
fun CalculatorApp() {
    var input by remember { mutableStateOf(TextFieldValue("")) }
    var result by remember { mutableStateOf("") }

    Column(
        horizontalAlignment = Alignment.CenterHorizontally,
        modifier = Modifier
            .fillMaxSize()
            .padding(16.dp)
    ) {
        TextField(
            value = input,
            onValueChange = { input = it },
            label = { Text("Enter expression") },
            modifier = Modifier.fillMaxWidth()
        )
        Spacer(modifier = Modifier.height(8.dp))
        Button(onClick = {
            result = try {
                eval(input.text).toString()
            } catch (e: Exception) {
                "Error"
            }
        }) {
            Text("Calculate")
        }
        Spacer(modifier = Modifier.height(8.dp))
        Text(text = "Result: $result", fontSize = 24.sp)
    }
}

fun eval(expr: String): Double {
    return expr.toDouble()
}
For simplicity, our current code converts the input directly to a double. However, to handle more complex expressions, we can use the exp4j library, which provides a powerful way to evaluate mathematical expressions.
Adding the Dependency
First, add the exp4j dependency to your build.gradle file:
dependencies {
    // Other dependencies
    implementation ("net.objecthunter:exp4j:0.4.8")
}
Updating the Evaluation Function
Next, update the eval function to use exp4j for evaluating the expressions:
import net.objecthunter.exp4j.ExpressionBuilder

fun eval(expr: String): Double {
    return try {
        val expression = ExpressionBuilder(expr).build()
        expression.evaluate()
    } catch (e: Exception) {
        Double.NaN // Return NaN if the expression is invalid
    }
}
Full Updated Code
Here is the complete code with the updated calculation logic:
import android.os.Bundle
import androidx.activity.ComponentActivity
import androidx.activity.compose.setContent
import androidx.compose.foundation.layout.*
import androidx.compose.foundation.text.BasicTextField
import androidx.compose.material.*
import androidx.compose.runtime.*
import androidx.compose.ui.Alignment
import androidx.compose.ui.Modifier
import androidx.compose.ui.unit.dp
import androidx.compose.ui.unit.sp
import androidx.compose.ui.text.input.TextFieldValue
import net.objecthunter.exp4j.ExpressionBuilder

class MainActivity : ComponentActivity() {
    override fun onCreate(savedInstanceState: Bundle?) {
        super.onCreate(savedInstanceState)
        setContent {
            CalculatorApp()
        }
    }
}

@Composable
fun CalculatorApp() {
    var input by remember { mutableStateOf(TextFieldValue("")) }
    var result by remember { mutableStateOf("") }

    Column(
        horizontalAlignment = Alignment.CenterHorizontally,
        modifier = Modifier
            .fillMaxSize()
            .padding(16.dp)
    ) {
        TextField(
            value = input,
            onValueChange = { input = it },
            label = { Text("Enter expression") },
            modifier = Modifier.fillMaxWidth()
        )
        Spacer(modifier = Modifier.height(8.dp))
        Button(onClick = {
            result = try {
                eval(input.text).toString()
            } catch (e: Exception) {
                "Error"
            }
        }) {
            Text("Calculate")
        }
        Spacer(modifier = Modifier.height(8.dp))
        Text(text = "Result: $result", fontSize = 24.sp)
    }
}

fun eval(expr: String): Double {
    return try {
        val expression = ExpressionBuilder(expr).build()
        expression.evaluate()
    } catch (e: Exception) {
        Double.NaN // Return NaN if the expression is invalid
    }
}
Step 5: Run Your App
Now, you can run your app on an emulator or physical device. You should see a simple interface where you can enter an expression and calculate the result
In summary:
Best wishes! You’ve just used Jetpack Compose to develop a basic calculator app. To get you started, here’s a simple example. You may build on it by adding more capabilities, such the ability to handle more intricate mathematical expressions and enhance the user interface.
Building Android UIs with more power and less code is made simple with Jetpack Compose. You’ll discover that Compose is a very useful tool for Android development if you continue to explore with it.
Please feel free to share this tutorial with others and ask any questions you may have in the comments section below if you found it helpful.


Leave a Reply