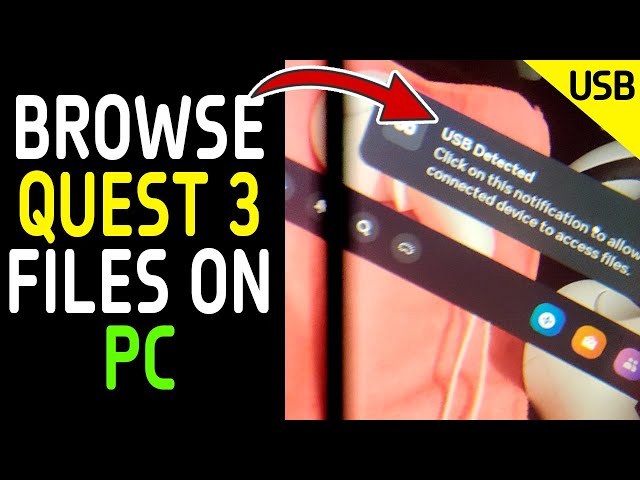
To transfer files from a PC to Quest 3, connect the headset to the PC via USB cable. Then, move files using the file manager.
Transferring files from your PC to the Quest 3 headset is a straightforward process. Start by ensuring you have a compatible USB cable. Plug one end of the cable into your PC and the other into the Quest 3 headset.
Your PC should recognize the device, allowing you to access its storage. Open your file manager on the PC and locate the files you wish to transfer. Drag and drop these files into the Quest 3’s storage folders. This method is quick and efficient, making it easy to move media, apps, and documents to your VR headset.

Credit: www.phonearena.com
Preparing Your Pc
Before transferring files from your PC to Quest 3, you must prepare your PC. This preparation includes checking system requirements and installing necessary software.
Check System Requirements
First, ensure your PC meets the system requirements. This step is crucial for a smooth file transfer process. Here is a table with the required specifications:
| Component | Requirement |
|---|---|
| Operating System | Windows 10 or later |
| USB Port | USB 3.0 or higher |
| Storage Space | At least 2 GB free |
Make sure your PC meets these requirements. If it does, you can proceed to the next step.
Install Necessary Software
To transfer files, you need specific software. Follow these steps to install the required software:
- Go to the official Oculus website.
- Download the Oculus software for Windows.
- Run the installer and follow the on-screen instructions.
Once installed, connect your Quest 3 to the PC using a USB cable. The Oculus software should recognize your device.
Next, you need a file transfer tool. We recommend using SideQuest for this purpose. Follow these steps to install SideQuest:
- Visit the SideQuest website.
- Download the SideQuest installer for Windows.
- Install the software by following the on-screen prompts.
With both Oculus and SideQuest installed, your PC is ready. You can now transfer files to your Quest 3.
Connecting Quest 3 To Pc
Connecting your Quest 3 to a PC opens up a world of possibilities. You can transfer files, manage content, and enhance your VR experience. Here’s how to connect your Quest 3 to your PC.
Using A Usb Cable
Connecting with a USB cable is the easiest way. Follow these steps:
- Get a compatible USB-C cable.
- Plug the USB-C end into your Quest 3.
- Connect the other end to your PC’s USB port.
- Put on your Quest 3 headset.
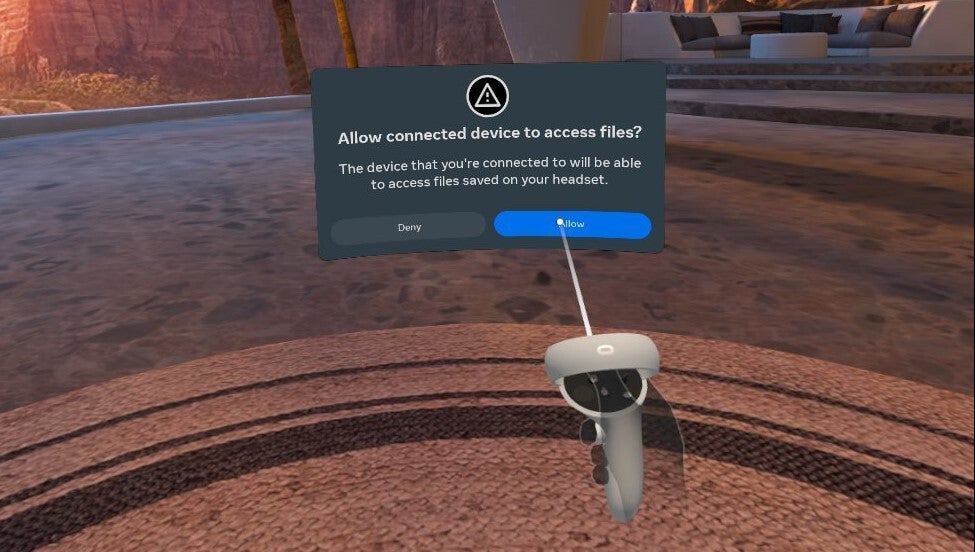
- Accept the prompt to allow data transfer.
Your PC should now recognize the Quest 3 as a storage device. You can transfer files between the devices easily.
Wireless Connection Options
Wireless connections offer more flexibility. Here are some options:
Using Wi-Fi Direct
- Ensure both devices are on the same Wi-Fi network.
- Open the settings on your Quest 3.
- Enable Wi-Fi Direct.
- On your PC, search for available Wi-Fi Direct devices.
- Select your Quest 3 and establish the connection.
Using Bluetooth
- Enable Bluetooth on both devices.
- Put your Quest 3 in pairing mode.
- On your PC, search for Bluetooth devices.
- Select your Quest 3 and pair the devices.
- Once paired, you can transfer files wirelessly.
Both USB and wireless methods are effective. Choose the one that suits your needs best.
Transferring Files Via Usb
Transferring files from your PC to Quest 3 is simple using a USB. This method is quick and reliable. It allows you to transfer large files efficiently.
Enable Developer Mode
First, you need to enable Developer Mode on your Quest 3. Follow these steps:
- Open the Oculus app on your smartphone.
- Go to Settings.
- Select your Quest 3 headset.
- Tap on More Settings.
- Enable Developer Mode.
Once Developer Mode is enabled, your Quest 3 can connect to your PC via USB.
Drag And Drop Files
With Developer Mode enabled, follow these steps to drag and drop files:
- Connect your Quest 3 to your PC using a USB cable.
- Put on your Quest 3 headset.
- Select Allow Access to Data when prompted.
- Open File Explorer on your PC.
- Find the Quest 3 device under This PC.
- Open the Quest 3 folder.
- Drag and drop your files into the correct folders.
Use the correct folders to ensure your files are easy to find. For example, put music in the Music folder and videos in the Movies folder.
Transferring Files Wirelessly
Transferring files wirelessly makes it easy to move data from your PC to Quest 3. No need for cables. Enjoy the freedom of wireless transfers.
Set Up Wi-fi Transfer
Ensure your PC and Quest 3 are on the same Wi-Fi network. Use a file transfer app like SideQuest. Follow these steps:
- Install SideQuest on your PC.
- Connect your Quest 3 to the PC using a USB cable.
- Enable Developer Mode on the Quest 3.
- Open SideQuest and follow the setup instructions.
- Disconnect the USB cable once the setup is complete.
- Transfer files wirelessly using the SideQuest app.
Use Cloud Storage Services
Cloud storage services offer a seamless way to transfer files. Popular options include Google Drive and Dropbox. Here’s how to use them:
- Create an account on a cloud storage service.
- Upload your files from the PC to the cloud.
- Download the corresponding app on your Quest 3.
- Log in to the app and access your files.
Using cloud storage keeps your files safe and accessible from anywhere. Enjoy the convenience of wireless transfers with these methods.
Troubleshooting Common Issues
Transferring files from your PC to Quest 3 can be tricky. Sometimes, you might face problems that disrupt the process. This section helps you solve common issues quickly and easily.
Connection Problems
Connection issues can stop file transfers. Here are some steps to fix them:
- Check the USB cable. Ensure it’s properly connected and not damaged.
- Use a different USB port on your PC.
- Restart both your PC and Quest 3. This can refresh connections.
- Update your device drivers. Outdated drivers can cause issues.
- Enable Developer Mode on Quest 3. This sometimes helps with file transfers.
File Compatibility Issues
Not all files work well with Quest 3. Follow these tips:
- Check file formats. Quest 3 supports formats like MP4, PDF, and JPG.
- Convert files to a supported format if needed. Use online converters.
- Check file size. Large files can cause problems.
- Organize files into folders. This makes finding them easier on Quest 3.
- Rename files if they have special characters. Simple names work best.

Credit: www.reddit.com
Optimizing File Transfer Speed
Optimizing the file transfer speed from your PC to Quest 3 ensures a seamless experience. Learn the best practices to make transfers fast and efficient.
Choosing The Right Cable
For the best transfer speed, use a USB 3.0 cable. USB 3.0 cables provide faster data transfer rates compared to USB 2.0. Ensure the cable is in good condition. Damaged cables can slow down the transfer process.
Here is a quick comparison of USB cables:
| Type | Speed |
|---|---|
| USB 2.0 | 480 Mbps |
| USB 3.0 | 5 Gbps |
Optimizing Network Settings
Ensure your network is optimized for fast transfers. Use a 5 GHz Wi-Fi network for better speed. A wired connection is even better if available.
Follow these steps to optimize your network settings:
- Use a high-speed router.
- Place your PC and Quest 3 close to the router.
- Limit the number of devices on the network.
Disabling background applications on both PC and Quest 3 helps. These apps can consume network resources.

Credit: www.phonearena.com
Frequently Asked Questions
How Do I Add Files To Quest 3 From My Pc?
Connect Quest 3 to your PC using a USB cable. Enable file transfer mode on the headset. Drag and drop files.
How Do I Transfer Files From My Computer To Oculus?
Connect your Oculus to your computer using a USB cable. Enable file transfer mode on the Oculus. Drag and drop files to the Oculus folder.
How To Transfer To Meta Quest 3?
To transfer to Meta Quest 3, backup your data first. Connect both devices to the same Wi-Fi. Use the Oculus app to sync and transfer your data seamlessly. Ensure both devices are fully charged.
How Do I Connect My Usb To Quest 3 Pc?
Connect your USB-C cable to the Quest 3 headset. Plug the other end into your PC. Enable USB debugging on your headset.
How To Connect Quest 3 To Pc?
Use a USB-C cable to connect your Quest 3 to your PC.
Can I Transfer Files Wirelessly?
Yes, use Wi-Fi and apps like SideQuest for wireless transfers.
What File Types Are Supported?
Quest 3 supports video, audio, and image files, among others.
Do I Need Special Software?
No special software is needed. File Explorer works fine for transfers.
Conclusion
Transferring files from PC to Quest 3 is simple with the right steps. Follow our guide for seamless file transfers. Ensure your VR experience is uninterrupted by keeping your files organized. Explore the full potential of your Quest 3 with ease.
Happy gaming and content sharing!


Leave a Reply